Welcome to Excel Jet Consult blog post. In this tutorial, we will learn how to successfully import Table from Excel workbook to SQL Server Client 11.0
In the caption below, we want to import the Data from the Sample – Superstore Excel workbook.


Having created a database in our SQL Server named Excel_Sample
- Right-click on Excel_Sample database
- Select Tasks and Import Data respectively


- In the Choose a Data Source dialogue box, from the Data Source drop-down, select Microsoft Excel
- Click on the Excel File Path drop-down and select the Excel workbook.
Note, I used Office 360 to do this import data and have tried the same using Microsoft Office 2019 pro plus version previously to do the same data import to SQL server
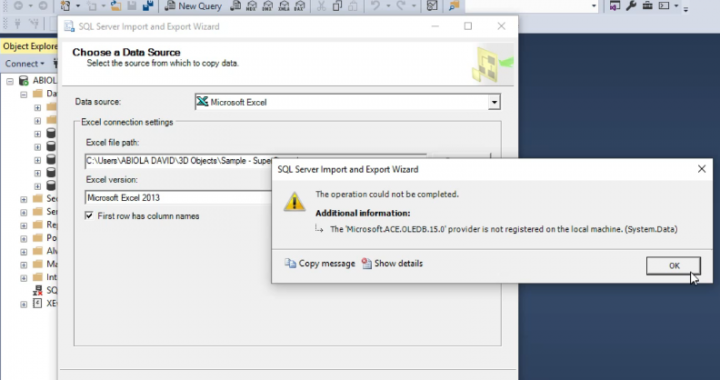
- Next, in the Excel version drop-down, we discovered that there is no Office 365 and 2019 version yet. An attempt to use Microsoft Office 2016, 2013, and older versions after clicking Next proved unsuccessful as seen in the caption below for 2013 version.


In this case, how do we get our data imported into SQL Server Client 11.0 as a Table? What we are going to do, since I am using Office 365 and 2019 versions, is to downgrade and save that Excel workbook as Excel 97-2013 Workbook as seen in the caption below


- Next, in the SQL Server, repeat step 4 above and select the downgraded 97-2003 Workbook


- Click Next.
- In the Choose Destination dialogue box, from the Destination drop-down, select SQL Server Client 11.0


- Click on Next (thrice)
- In the Select Source Tables and Views dialogue box, check the Order$ table


- Click Next and Finish
- Right-click on the Excel_Sample database and select Refresh
- Click on New Query and in the Query window, execute the query:
Select * from Order


We have successfully import the data from Excel to SQL. Note, for those using Excel versions 2016, 2013, 2010 and older version, all they required is to select the corresponding version that matches the version they are using
